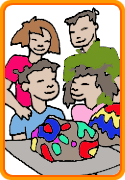
Here's a craft even the very youngest children can get involved in and end up bursting with pride to give away. "My husband just started a new job so we gave the paperweights to him for his new office. The kids really felt as though they were making his new job a better place to work." (a Connecticut mom)
If you have ever left crayons in the car on a hot day you know what happens. They melt all over everything! That is what happened to make me think of this project. The smallest children can help by pounding to break up the crayons, yet this activity is fun for all ages. All of our families reported that "crayon smashing" was a big hit. Christine LaClair (4) "thought it was neat that we crushed the crayons with my wooden hammer (that I'd been hiding!)." The Sypniewski family used a meat tenderizer for a mallet with great success.
Here is what you'll need:
* Old crayons
* Zip-to-close plastic bag
* Wooden or rubber mallet
* Smooth, flat rock about the size of your fist
* Aluminum foil or an old pie tin
* Felt scrap
* Scissors
* White glue
Here's what you do:
* Choose crayons in three or four light or bright colors. Dark crayons will make the color on the rock look muddy.
* Peel the crayons, put them in the zip-to-close bag, and seal it.
* Place the bag on a hard surface such as a sidewalk, and using the mallet, pound the crayons into small pieces.
* Place the rock in the pie tin or on a sheet of aluminum foil in the hot sun. Sprinkle it with the crayon pieces.
* When the crayon pieces have melted, but before they reach the point that they run off the rock, take the rock out of the sun to cool. The crayon will quickly harden and form a colorful and waxy coat over the rock.
* Cut a piece of felt to glue to the bottom of the rock to keep it from scratching the table.
A Calfiornia mom improvised here and used moleskin, the adhesive-back bandages used by hikers. She didn't have any felt, she explained, and the drugstore was more on her regular route than the crafts or fabric store.
Problem: It just hasn't been hot enough to do this project in your area, but the children are very interested in trying it.
Solution: Preheat the oven to 350 degrees. Place the rock on a foil covered cookie sheet and put it in the oven for your child. Keep an eye on it because the crayon melts quickly. It will re-harden within seconds of taking it out of the oven.
Only the Connecticut family had a day that was hot enough to melt the crayons outside. The LaClairs, in upstate New York, had an original solution to this problem. "We thought it was a warm enough day at 75 degrees and sunny, but after half an hour nothing was happening, so I put the rocks on the bbq grill. It took just a minute for the crayons on the lid to melt, then the ones on the thin rocks, then the fat rocks started to bubble. I used a spatula to remove the rocks when they were done." To be done outside, this project needs a hot, direct sun. I'm going to try this project again with a bottle "greenhouse" over it, and I'll report back on the success of this experiment.
Problem: You are unhappy with the color of a crayon-coated rock.
Solution: Reheat the rock and allow the crayon to melt to the point where most of it drips off the rock and onto the foil under it. Cover the rock with a new selection of crayon bits and see if you get a swirl of color you like better. Remember to avoid dark colors.
Hannah Sypniewski "liked doing this project and "how it felt," but her mom "really didn't think it was too spectacular." Remember, it is very fast and easy to redo this project to get better results. Ryan (11) LaClair's looked like a "tie-dyed rock." That is exactly the effect you are looking for. The distinct lines of color can be very beautiful so do not settle for anything less than the "spectacular." Because the rocks can be so easily redone, remember not to place the completed ones that you like in a sunny window or direct, hot sunlight because they will re-melt.
Problem: You live in the city and can't find a rock.
Solution: Try sprinkling crayon bits on the indented end of a metal lid from a frozen juice can instead. Attach a piece of sticky-back magnet to the back of the lid and stick the colorful crayon disc on the refrigerator.
Warning: The LaClairs--who used their grill, put glitter crayons in their projects and loved the results. With many people substituting microwaves for ovens, I want to remind everyone to never put glitter crayons in the microwave because the glitter bits are metal.
Web sites to visit:
Visit the Crayola crayon website, www.crayola.com, for all sorts of project ideas using crayons. Be sure to check the crayon projects found in the craft section of www.homeschoolzone.com
TAKE IT FROM ME:
"I would definitely recommend using high quality crayons for this project rather than the cheaper ones. The colors will be much brighter on the rock with a high quality crayon. You usually can tell the quality of the crayon by the intensity of the color when used on paper." --Kathy Ross


